Do You Actually Need a Brake Caliper Compressor ‘Rewind Tool’ to Swap Your Pads?
My friend reached out to me and said she wanted to learn to change her own brake pads. She asked if she could come over to my shop for space to work, and some guidance. I’ve been doing my own brake jobs for years, but said to myself, “Henry, it’s time you start doing brake jobs the right way.” So I logged into Amazon and ordered a specialty “brake caliper compressor” tool for the maintenance job.
So what in the world is that? To get to a car’s brake pads, you’ll need to unbolt each brake caliper and swing it up, away from the rotor. While it’s sitting there, and you are swapping the pads, pressure in the system will probably push the piston that activates your brakes all the way out. When you try to swing it back down, you’ll be frustrated to find there isn’t room to fit it around your new pads. You’ll grab the piston and try to depress it, but there will be too much pressure in the system to move it with your hands. So you’ll swear and kick things, and maybe break down and cry. All of this could have been avoided with a brake caliper compressor.
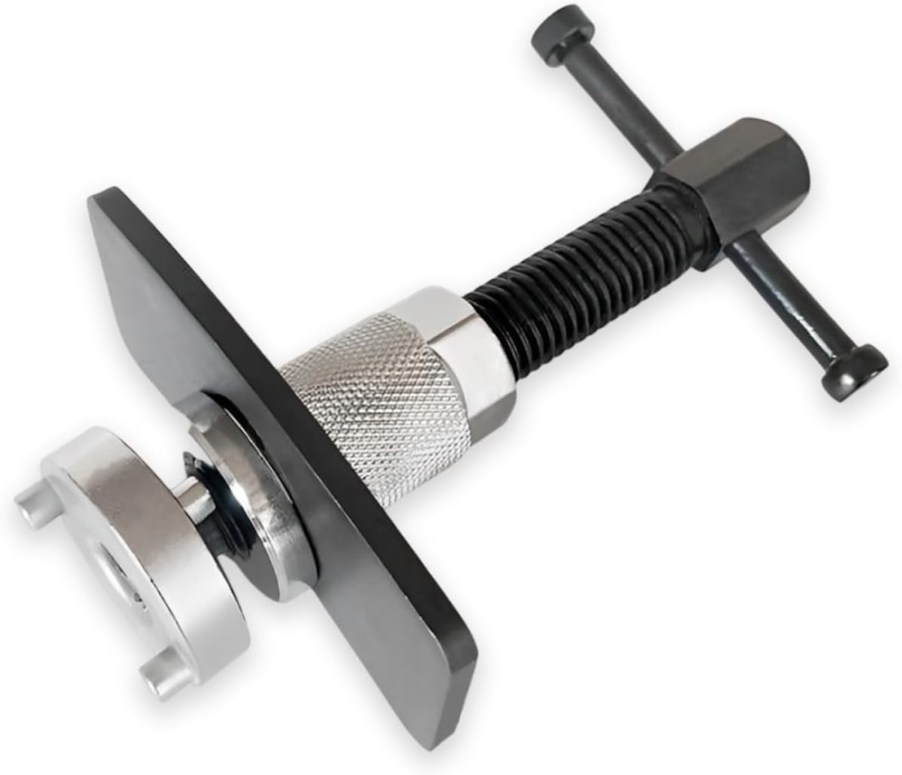
A brake caliper compressor is a mechanical plunger with a long screw. You spin its handle and this plunger lengthens. It also has a pair of tabs so when you fit it into a brake caliper housing, it won’t go anywhere. With this brilliant tool, you can spin the handle with one hand and easily depress the brake caliper’s piston until it will fit over your new pads. No swearing or crying necessary. Unfortunately, my friend’s first brake job wasn’t nearly that easy.

For the first time in years, Amazon’s two-day shipping let me down. Despite multiple very apologetic emails, there was nothing the retail giant could do: my shiny new brake caliper compressor tool was in a warehouse in Tennessee and I wouldn’t see it until next Wednesday.
Remember that I’ve been doing brake jobs without a caliper compressor for years? I swaggered over to my truck’s toolbox and retrieved a huge carpenter’s “C clamp.” My MacGyver solution has always been to wrap this C clamp around the body of my brake caliper, and tighten its plunger against the caliper’s plunger. This is plenty of force to depress the plunger and reinstall the caliper.
So cocky as can be, I carried the clamp over to my friend’s car and wrapped the clamp around the brake caliper. And it didn’t fit. The car in question was a 2015 Chrysler 200 with electronic parking brakes. This system holds the brakes in place with an actuator, which is attached to the back of the caliper. The entire package was far too big for my C clamp.

You’ll be thrilled to hear that neither of us resorted to swearing or kicking things. Instead, I opend the C clamps as wide as they would go and tried a handful of different angles. I finally found that I could hook the stationary end of the C clamp into a ridge of the caliper and, at a steep angle, get the plunger just into place. I had to crank it, then release and reposition, then crank it again. I also had to be very careful I was clearing the brake lines, because braking one of them would be a royal pain. But finally, I got the brake caliper piston compressed.
The moral of my story: It may be possible to compress your brake pistons without a proper brake caliper compressor tool. But on many new cars, it will be difficult. And honestly, it isn’t worth it. My “Brake Caliper Piston Rewind Tool” cost $13 and would have made quick work of the piston on the Chrysler. You can probably borrow one from your local parts store for just a deposit. But whatever you decide to do, don’t pull a “Henry” and wait until the very last minute.
Next, learn why some Europeans change oil every 20,000 miles, or see Autozone’s directions on using its loaner brake caliper tool in the video below:


